ROBOTICS PROJECT #1
1. State the assignment (problem/project) in your own words.
the project is to create a robot and then have the robot travel the entire length of the 3 tables and stop before it falls.
2. What are your input factors? (What do you need to know or do before you can begin?) Include the research you did.
the input factors are the website where in explains how to build the robot, The distance of the 3 tables, The circumference of the wheel and the power we had to put into the robot.
3. Describe the process in detail. Explain the steps you followed in order to complete the project.
We went to the website and built the robot the added a 3rd wheel and a holder for the cup of legos. The we had to program the robot to travel the table then stop.
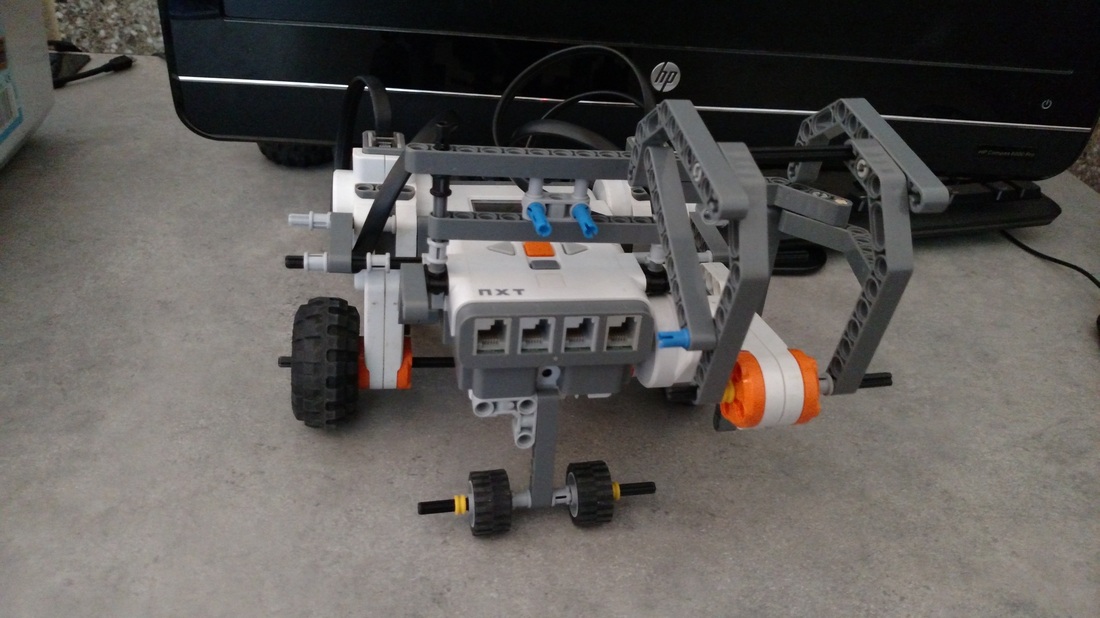
4. Describe the final output / product in detail: (what are we looking at?)
The robot can successfully travel the table and stop before falling while not dropping any legos.
5. Describe feedback you received during the project (suggestions, comments, etc). From peers, instructor etc.. How did you use this feedback to correct issues with your project?
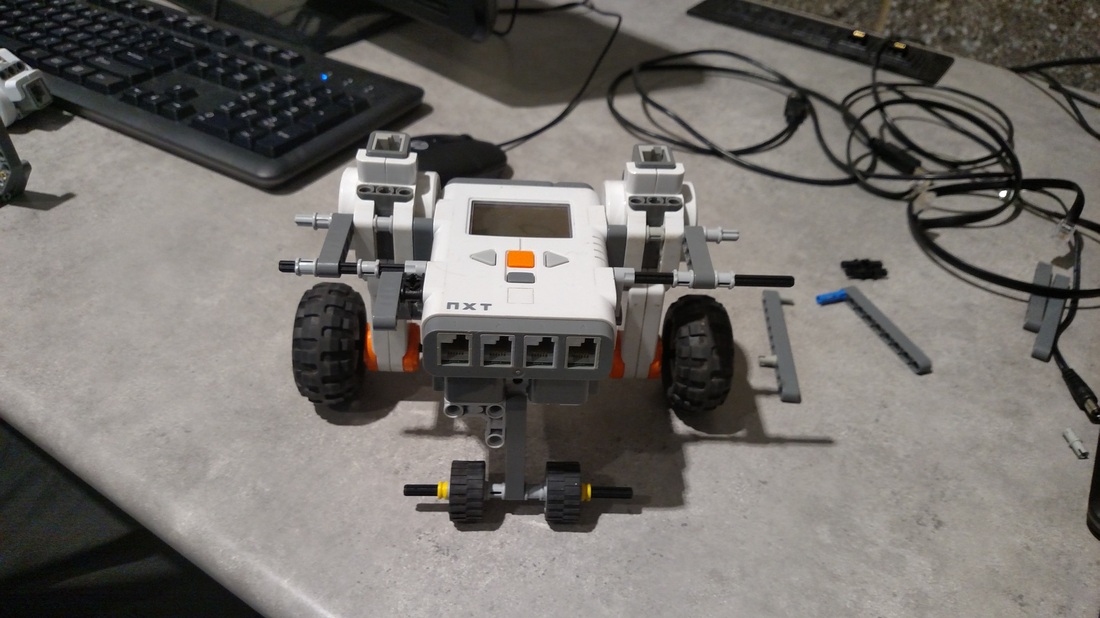
My partner and me went back and forth on how to make the 3rd wheel and eventually made an axis and a third wheel.
6. What did you learn during the assignment such as tools, skills, design concepts, software, hardware, etc? ,
I learned how to build the robot and to also make a program that the robot can use.
7. If you were to do the project again, what would you do differently and why? Provide reasons and examples
I would use a 4th wheel and try to not of balance the robot because multiple times the robot would go left not straight.
the project is to create a robot and then have the robot travel the entire length of the 3 tables and stop before it falls.
2. What are your input factors? (What do you need to know or do before you can begin?) Include the research you did.
the input factors are the website where in explains how to build the robot, The distance of the 3 tables, The circumference of the wheel and the power we had to put into the robot.
3. Describe the process in detail. Explain the steps you followed in order to complete the project.
We went to the website and built the robot the added a 3rd wheel and a holder for the cup of legos. The we had to program the robot to travel the table then stop.
4. Describe the final output / product in detail: (what are we looking at?)
The robot can successfully travel the table and stop before falling while not dropping any legos.
5. Describe feedback you received during the project (suggestions, comments, etc). From peers, instructor etc.. How did you use this feedback to correct issues with your project?
My partner and me went back and forth on how to make the 3rd wheel and eventually made an axis and a third wheel.
6. What did you learn during the assignment such as tools, skills, design concepts, software, hardware, etc? ,
I learned how to build the robot and to also make a program that the robot can use.
7. If you were to do the project again, what would you do differently and why? Provide reasons and examples
I would use a 4th wheel and try to not of balance the robot because multiple times the robot would go left not straight.
ROBOTICS PROJECT #2
This is the robot stopping, we then move the box and it keeps going
This is the robot stopping when the box is right in front of it
this is the robot going around the box
| a_step_by_step_guide_to_the_engineering_design_process2014_1.ppt |
Racing against Jade(rip), Michael in the most epic race of the century.
https://docs.google.com/a/student.sbregional.org/presentation/d/1i9EOnfCyqr273niRsrfSl6fp_sq334PhndU0a1EaC6s/edit#slide=id.p43
Robotics project 4

Angle of the triangle
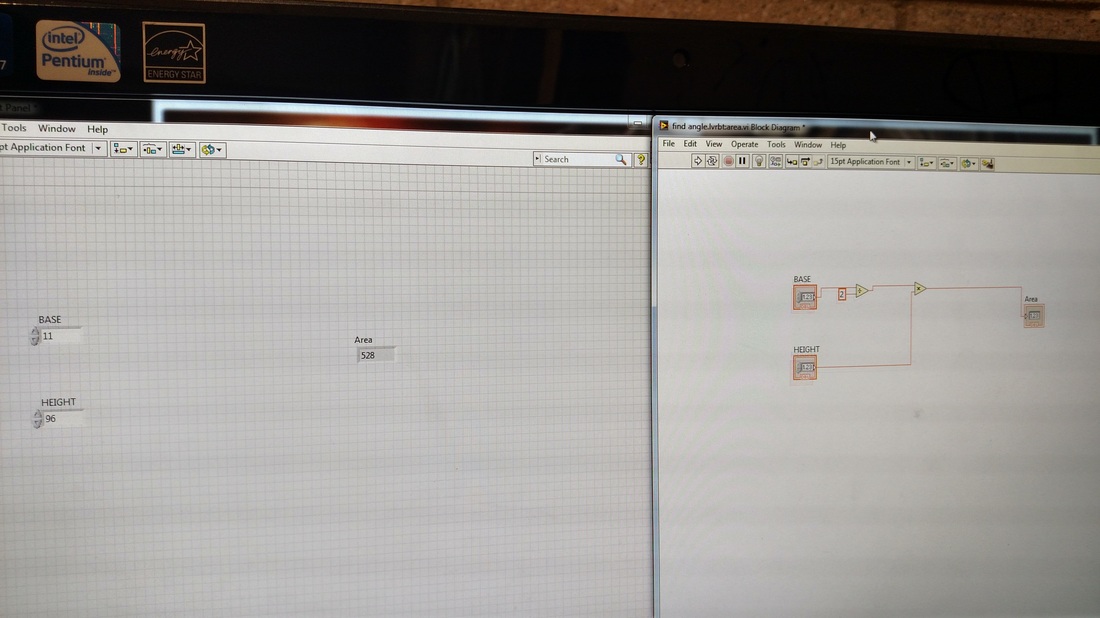
area of the triangle
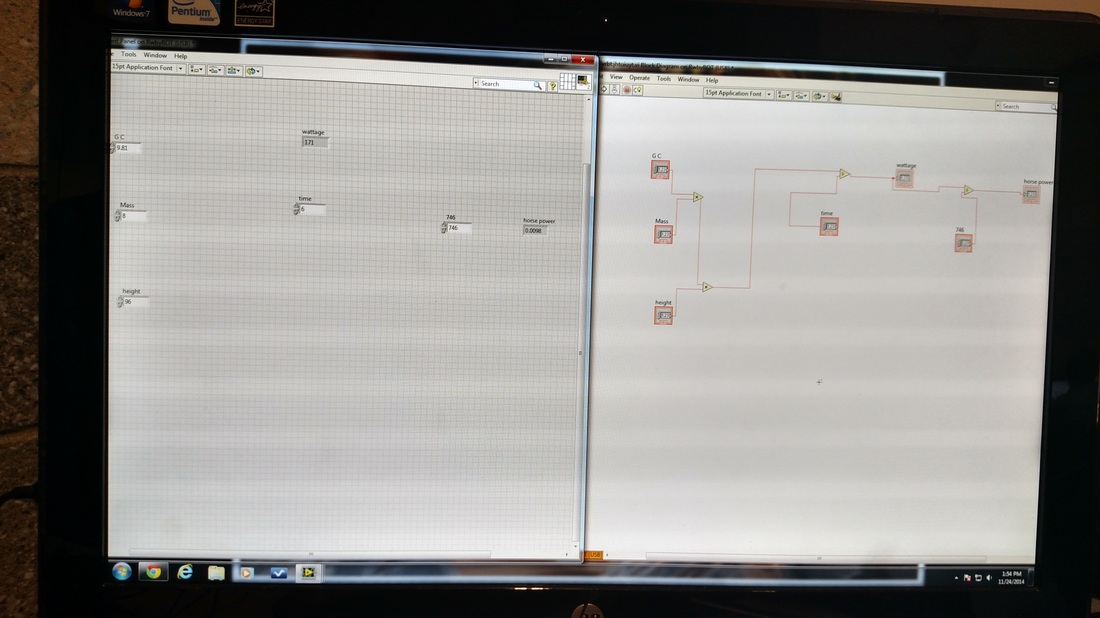
Horsepower
ROBOTICS PROJECT #5
|
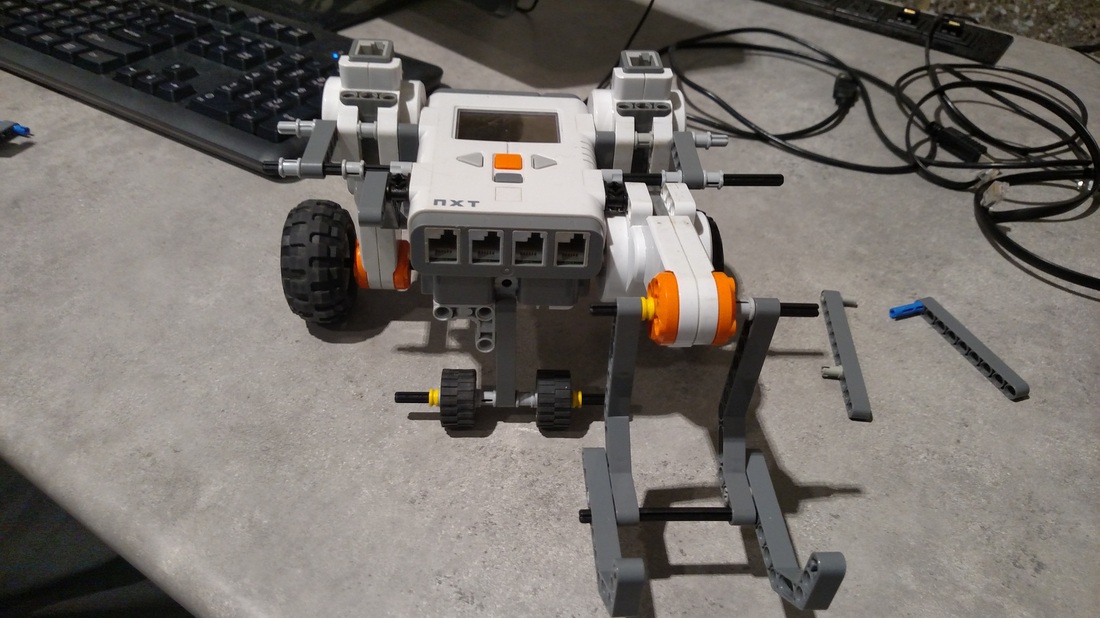
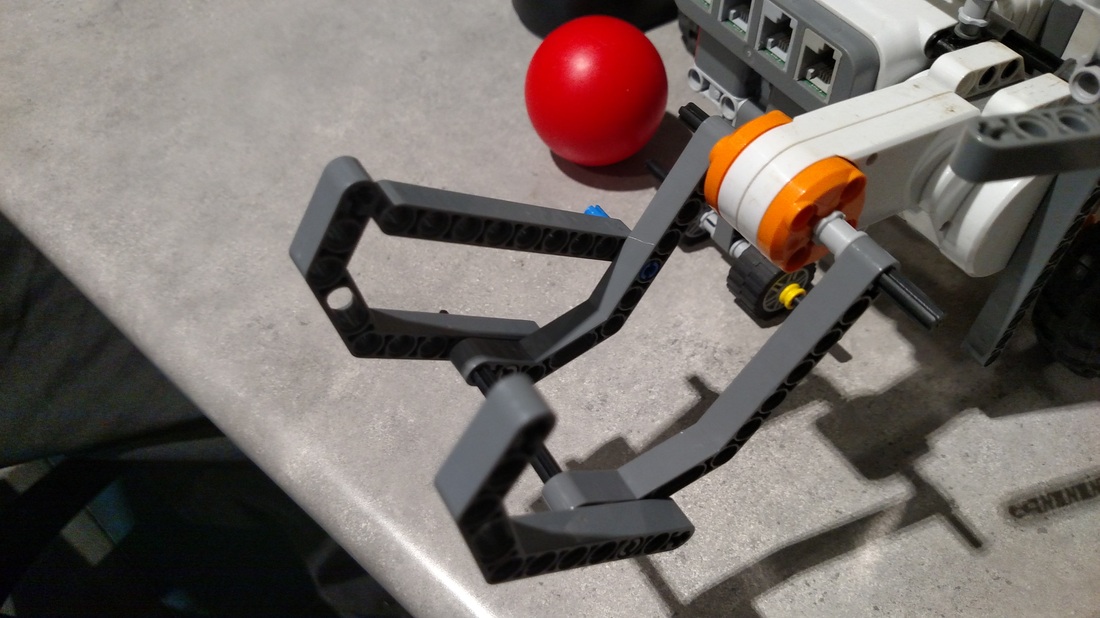
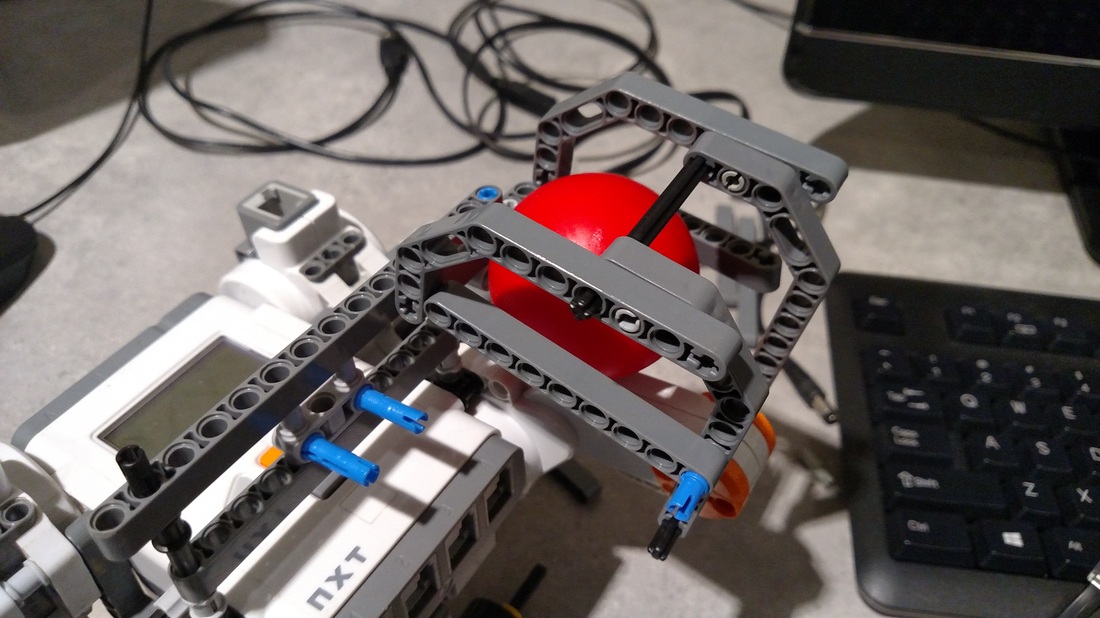
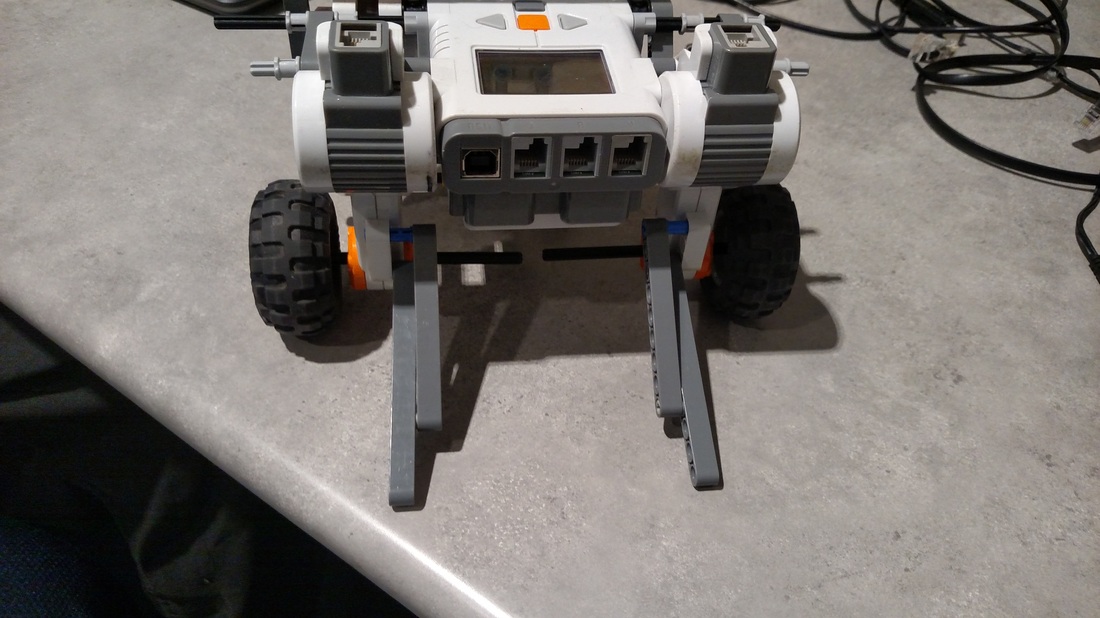
The first picture of the robot ,is the start of us making it. The second picture is when we made a part that will be able to pick up the ball and put it over the wall. The third and fourth picture is a box that will hold the ball and will release it over thew wall. The 5th picture is how we stopped the robot from falling over. The final picture is the final prototype.
|
|
This is our link to the slide show for our sumo-bot
https://docs.google.com/presentation/d/1UwwSvo3HBcZ6HVwjQAhfz9ATjYttroBt8dnXQ12W9Zo/pub?&loop=false&delayms=3000
This is our link to the slide show for our catapult bot.
https://docs.google.com/presentation/d/1vCl4F0H4v2phi_WnMN1u8nCUupithHInRn4RbmYX-48/pub?&loop=false&delayms=3000
maze bot
at 10 seconds the bot had the most light.
